

Views: 0 Author: Site Editor Publish Time: 2026-10-26 Origin: Site


Replacing a full drum of milling teeth is a labor-intensive necessity. This job often takes upwards of 2.5 to 3 hours for a standard crew. Improper installation drastically accelerates wear and multiplies equipment downtime on the job site. Fleet managers and paving contractors face shrinking margins when incorrect seating leads to catastrophic drum damage. Ignored holder wear causes seized picks. Mismatched bit profiles halt milling operations entirely, leaving trucks waiting and crews standing around. Establishing a standardized, technically rigorous protocol prevents premature failure. This guide breaks down exact specifications, tooling requirements, and validation checks. You will learn how to install teeth correctly to protect your machinery investment. A strict mechanical routine keeps your milling machine eating asphalt instead of sitting in the repair shop. Proper execution directly impacts your bottom line and project timelines.
Material Matching is Non-Negotiable: Selecting the correct carbide tip profile based on milling resistance (e.g., soft asphalt vs. high-PSI concrete) dictates the baseline lifespan of the tooth.
Rotation is the Primary Success Metric: A properly installed tooth must spin freely; failure to verify rotation leads to uneven wear, flat-spotting, and eventual holder destruction.
Holder Integrity Dictates Tooth Performance: Installing new teeth into compromised or heavily worn tool holders guarantees premature failure, making pre-installation inspection critical.
Standardized SOPs Reduce Downtime: Utilizing the correct pneumatic extraction tools, staging inventory, and applying proper seating methods reduces a 3-hour replacement job while ensuring consistent installation tolerances across the entire drum.
A successful installation results in uniform wear patterns. It creates predictable replacement intervals. It guarantees zero damage to the base drum structure. When teeth sit perfectly flush, impact energy transfers safely into the heavy steel drum. The machine operates smoothly. Hydraulic pressures remain stable. Fuel consumption stays within expected ranges. Operators feel less vibration in the cab.
Milling resistance miscalculation destroys profit margins. Forcing incorrect or improperly seated teeth through high-resistance materials causes severe problems. The machine must work harder to achieve the same cutting depth. The engine lugs down. The hydraulic system strains to maintain drum RPM. Fuel consumption spikes immediately. The carbide tips overheat and fracture. You lose cutting efficiency within minutes.
When a milling machine encounters high resistance with dull or improperly seated teeth, the hydraulic system compensates by increasing pressure. This pressure spike generates excess heat in the hydraulic fluid. The cooling system works overtime. The engine burns more diesel to maintain the required horsepower. A machine burning 15 gallons per hour can easily jump to 22 gallons per hour just fighting dull teeth. Over a 10-hour shift, that extra fuel burn destroys your daily profit margin. Furthermore, the vibration from unseated teeth travels up the drum housing. It shakes the entire chassis. This vibration loosens electrical connections, cracks hydraulic lines, and fatigues the operator.
Cascading failure modes start with a single seized tooth. A tooth that cannot spin will drag through the asphalt. The carbide tip wears flat on one side. Once the carbide is gone, the steel body grinds away. The kinetic energy transfers directly into the tool holder. This causes weld fractures. The base block shears off the drum. You now face costly, specialized drum repairs. The machine sits idle for days.
Labor and tooling trade-offs dictate your turnaround time. Manual extraction methods rely on hammers and punches. This approach exhausts mechanics rapidly. Swing fatigue leads to angled strikes. Angled strikes bend the new tension sleeves during installation. Investing in pneumatic tools standardizes seating force. A pneumatic driver seats every tooth with the exact same pressure. It reduces mechanic fatigue. It cuts replacement time down significantly.
Installation Method | Seating Consistency | Mechanic Fatigue Level | Risk of Sleeve Damage | Average Time per Drum |
|---|---|---|---|---|
Manual Hammer & Punch | Highly Variable | Severe | High (due to angled strikes) | 3.5 to 4 Hours |
Pneumatic Driver Tool | Perfectly Uniform | Minimal | Low (straight linear force) | 2 to 2.5 Hours |
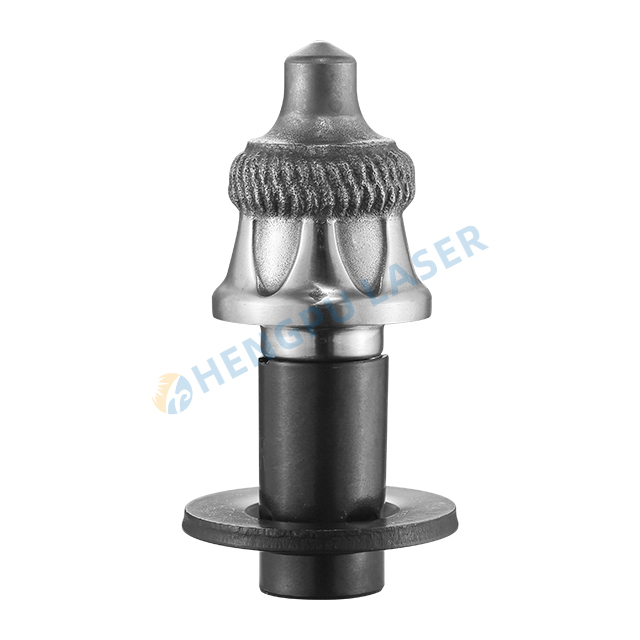
Before installing new teeth, inspect the mounting hardware. Check the mounting bolts of the milling drum tool holders for looseness. A perfectly seated tooth will still fail if the base block shifts. The block must remain rigid under extreme milling resistance. Torque all base bolts to factory specifications. Replace any stretched or stripped hardware immediately.
Establish baseline holder tolerances before unpacking new teeth. Evaluate the internal bore wear. If the holder bore is stretched, the new tooth will vibrate. Vibration shatters the carbide tip. Use a go/no-go gauge to test the bore diameter. If the gauge drops in too easily, the holder is compromised. You must replace the holder before installing a new tooth.
Strict road milling bit holder maintenance protocols save drums. Clean the holder cavity thoroughly. Remove all compacted asphalt and rock dust. Inspect the base block welds for hairline cracks. A clean bore is mandatory for proper seating.
Clear debris and prep the surface meticulously. Use specialized cleaning brushes. Chuck a wire brush into a cordless drill to scour the bore walls. Follow up with high-pressure compressed air. Blow out every single holder. Aggregate trapped at the bottom prevents the tooth from seating fully. A high-sitting tooth bends upon the first ground strike.
Pneumatic tools require a reliable air supply. Ensure your service truck compressor delivers a consistent 90 to 120 PSI. The tools need at least 10 CFM to operate efficiently. If the pressure drops, the pneumatic driver will not seat the tooth fully. The mechanic will think the tooth is seated because the tool stopped driving, but the wear washer will still sit a millimeter above the holder. That one millimeter gap allows asphalt fines to pack underneath the washer. The fines harden like concrete. The tooth loses its ability to rotate.
Evaluate the retainer clip grooves inside the holder. Look for wear that prevents the tension sleeve from engaging. If the groove is washed out, the tooth will fall out during operation. The sleeve needs a sharp internal edge to grip correctly.
Inventory staging drives efficiency. A full drum often requires 15 or more boxes of teeth. Organize and stage bulk replacements before starting the job. Open all boxes. Remove the plastic wrapping. Stage the boxes along the length of the drum. This prevents workflow interruptions. The maintenance crew can hit the 2.75-hour turnaround benchmark when they do not have to walk back and forth for parts.
Holder Condition | Visible Symptom | Required Action |
|---|---|---|
Compacted Asphalt Fines | Tooth sits high; will not seat flush | Scour with wire brush and blow out with compressed air |
Stretched Internal Bore | Tooth wobbles easily by hand after seating | Replace the entire tool holder block |
Washed-out Retainer Groove | Tooth pulls out with minimal upward force | Weld on a new holder or replace base block |
Cracked Base Weld | Visible hairline fractures along the drum weld | Grind out old weld and re-weld to OEM specs |
Categorize your choices by material hardness. You need a framework for choosing between standard asphalt teeth, heavy-duty concrete teeth, and soil stabilization picks. Standard asphalt requires a balanced tooth. High-PSI concrete demands massive carbide inserts. Soil stabilization needs wide, blunt profiles. Match the tooth to the overall milling resistance of the job site.
Evaluate carbide tip profiles and penetration rates. Cap-shaped tips handle general milling well. They protect the steel body from abrasive wear. Cylindrical tips impact milling speed on harder surfaces. Pointed carbide tips offer high penetration rates. Pointed tips cut fast but fracture easily in rocky aggregate. Choose the profile based on the aggregate size you expect to hit.
Tungsten carbide is not a single material. It is a composite. Manufacturers mix tungsten carbide powder with a cobalt binder. The ratio of cobalt determines the hardness and impact resistance of the tip. A higher cobalt content makes the tip tougher and more resistant to shattering upon impact with manhole covers or large river rock. However, more cobalt makes the tip softer, so it wears down faster in highly abrasive asphalt. A lower cobalt content makes the tip harder and more wear-resistant, but it becomes brittle. Brittle tips shatter easily in rocky conditions. You must match the cobalt ratio to your specific job site aggregate.
Understand shank size and tension sleeve variations. Common shank sizes include 20mm, 22mm, and 25mm. Heavy machines require thicker shanks to handle the torque. Select the appropriate tension sleeve design. Smooth sleeves work well in brand-new holders. Corrugated sleeves expand to grip slightly worn holders. road milling teeth for asphalt machinery must match your specific drum's RPM and vibration profile.
Consider OEM versus aftermarket options carefully. Evaluate the metallurgical quality of the steel body. Look closely at the brazing consistency. The braze holds the carbide tip to the steel. Poor brazing lets the tip fall out under heat. Check the warranty support when shortlisting replacement teeth vendors. High-quality aftermarket teeth often match OEM specs, but you must verify their wear tolerances firsthand.
Standardize your required tooling. Mandate the use of copper or soft-faced hammers. Never strike a carbide tip with a hardened steel hammer. Steel-on-carbide impacts cause micro-fractures. The tip will shatter as soon as it hits the pavement. Pneumatic installation tools are far superior. They drive the tooth straight down without lateral shock. Always wear proper PPE, including safety glasses and heavy gloves.
Adhere strictly to manufacturer specifications. Follow exact OEM standards for seating depth. The tension sleeve orientation matters. Some manufacturers require the sleeve gap to face a specific direction. This guarantees the Road Milling Teeth fix correctly and safely. Ignoring these specs leads to loose teeth and damaged holders.
Align the tension sleeve carefully. Read the technical instructions on orienting the retainer clip. If the sleeve has a gap, position it according to the manual. This ensures uniform radial expansion inside the holder. If you force a misaligned sleeve, it will crush. A crushed sleeve cannot hold the tooth in place.
Apply the correct seating force. Drive the tooth into the holder steadily. Stop when the wear washer sits completely flush against the top of the tool holder. You will hear the pitch of the hammer strike change. It shifts from a hollow ring to a solid thud. That solid thud means the tooth is seated. Do not over-strike. Over-striking damages the holder face.
Verify road milling pick rotation immediately. This is the critical final step. Manually spin every single installed tooth. Grab the tip and twist it. If a tooth does not rotate smoothly by hand, you have a problem. You must extract it. Re-clean the holder bore. Check the sleeve for damage. Re-seat the tooth. road milling picks that cannot spin will flat-spot and die within the first hour of cutting.
Follow this exact sequence to ensure proper installation across the entire drum:
Extract the old tooth using a pneumatic punch tool.
Scour the empty holder bore with a wire brush attachment.
Blow out all remaining dust and debris with compressed air.
Inspect the holder bore with a go/no-go gauge.
Align the new tension sleeve gap according to OEM specs.
Insert the new tooth into the holder by hand until it stops.
Drive the tooth down using a pneumatic seating tool or soft-faced hammer.
Stop driving the moment the wear washer sits flush against the holder face.
Grab the carbide tip and manually spin the tooth 360 degrees.
Move to the next holder and repeat the process.
Respect the break-in period. Do not drop the drum into full-depth concrete immediately. Run at recommended operating speeds for the first 15 to 30 minutes. Keep the milling depth shallow. This allows the tension sleeves to seat fully under operational vibration. The heat and vibration expand the sleeves to their final resting shape.
Establish mid-shift inspection protocols. Operators must safely shut down the machine every few hours. Visually inspect the drum. Look for missing teeth. Check for loose mounting bolts. Identify any uneven wear patterns early. Catching a single seized tooth mid-shift saves the tool holder from total destruction.
Calibrate the water spray system. The machine's cooling system must direct adequate water flow to the newly installed teeth. Water cools the carbide. It suppresses dust. If the nozzles clog, the teeth overheat. Sudden contact with a puddle causes thermal shock. The hot carbide shatters instantly. Clean the spray nozzles daily to prevent carbide degradation.
The water spray system requires precise calibration. Each nozzle should deliver a specific gallons-per-minute (GPM) flow rate. Check the manufacturer specs for your drum width. A standard 2-meter drum might require 15 to 20 GPM total flow. If the flow drops below 10 GPM, the teeth will overheat. The water must hit the teeth directly. Adjust the spray bar angle so the water strikes the carbide tips just as they exit the cut. This cools the tip and flushes the holder bore simultaneously.
Teeth seizing immediately after installation is a common failure. The root cause is usually inadequate holder cleaning. Bent tension sleeves from forced installation also cause seizing. The mitigation is strict adherence to bore cleaning SOPs. Use pneumatic seating tools to drive the teeth straight. Never hammer a tooth in at an angle.
Excessive flat-spotting on carbide tips ruins your investment. The root cause is a lack of rotation. Compacted fines enter the holder gap and lock the tooth in place. The mitigation involves upgrading your hardware. Use teeth with integrated dust shields. Install heavy-duty wear washers. Keep the water system running to flush out the fines.
Teeth falling out during operation poses a massive safety risk. The root cause is worn holder bores. Fatigued retainer clips also let go under vibration. The mitigation requires strict gauge testing. Implement a mandatory go/no-go gauge protocol for tool holders. Test every holder before authorizing new tooth installation. If the holder fails the gauge, cut it off and weld on a new one.
Extracting a seized tooth requires patience. Do not use a cutting torch near the holder block. The heat from the torch alters the metallurgy of the steel holder, making it brittle. Instead, use a heavy-duty pneumatic punch from the backside of the holder. Apply penetrating oil to the shank and let it sit for ten minutes. Drive the tooth out with short, rapid bursts from the air hammer to break the compacted fines loose without warping the bore.
Audit your current extraction and installation tooling to eliminate manual hammers and transition to pneumatic drivers.
Train your maintenance crew on proper bore cleaning techniques using wire brushes and high-pressure compressed air.
Implement a mandatory rotation-check sign-off sheet for all drum maintenance before the machine leaves the yard.
Purchase go/no-go gauges for every mechanic truck in your fleet to verify holder tolerances in the field.
A: It takes roughly 2.5 to 3 hours to replace teeth on a standard 2-meter drum. You can hit this benchmark by staging boxes of teeth beforehand. Using pneumatic extraction and installation tools drastically reduces manual labor. Standardizing your cleaning and seating processes keeps the crew moving efficiently without unnecessary delays.
A: Rotation ensures the carbide tip wears evenly in a conical shape. This self-sharpening action maintains cutting efficiency. If a pick stops rotating, it drags against the asphalt. This creates a flat spot. A flat-spotted tooth loses its carbide quickly, exposing the steel body and eventually destroying the tool holder.
A: You must perform holder maintenance every single time you replace a tooth. Inspect the holders, check mounting bolts for looseness, and clean the bores thoroughly. Skipping this step allows asphalt fines to compact in the bore. This prevents new teeth from seating flush and leads to immediate failure.
A: No. Asphalt and concrete have vastly different milling resistances. Standard asphalt teeth feature smaller carbide tips designed for softer aggregates. Using them on high-PSI concrete leads to rapid carbide fracture and premature failure. You must switch to heavy-duty concrete teeth with larger, reinforced carbide inserts for rigid pavements.
A: The primary culprits are trapped asphalt fines and rock dust locking the shank. Deformed tension sleeves caused by improper, angled hammering also wedge the tooth tightly. Finally, warped or stretched tool holders bind the tooth body. Proper cleaning and straight, pneumatic seating prevent seizing.
A: Follow your specific manufacturer specifications. Most modern milling systems rely on a dry, interference fit. Applying heavy greases or anti-seize compounds can actually attract abrasive dust. This dust mixes with the grease to form a grinding paste, which locks the tooth and destroys the holder bore.
A: Lifespan is highly variable. It depends on aggregate hardness, cutting depth, and machine ground speed. A tooth might last 40 hours in soft asphalt but only 4 hours in hard concrete. The most critical factor is installation. Proper seating and verified pick rotation guarantee the maximum possible lifespan for any given material.


